介绍
分布式部署,RabbitMQ(简称MQ)作为消息中间件是一个非常不错的选择,可以实现异步互不干扰的解耦操作。
解决需求
当有两套系统分别部署时,需要同步一部分数据,或者需要互不干扰解决异步独立运行时,可以使用RebbitMQ来给两套系统解耦,使用RebbitMQ作为中间件,只做消息传输使用,当系统A宕机或者因故障无法使用时,不会影响到系统B的正常运行!
部署MQ
使用Docker部署,安装Docker可以参照之前写的 CentOS7 安装 Docker,或者Ubuntu16.04/Ubuntu18.04 安装 Docker。
下载镜像
镜像地址 rabbitmq
1 | docker pull rabbitmq:management |

1.png
1 | # 创建容器并运行 |

2.png
配置MQ
安装MQ

3.png
使用默认用户名密码登录
username:guest password:guest
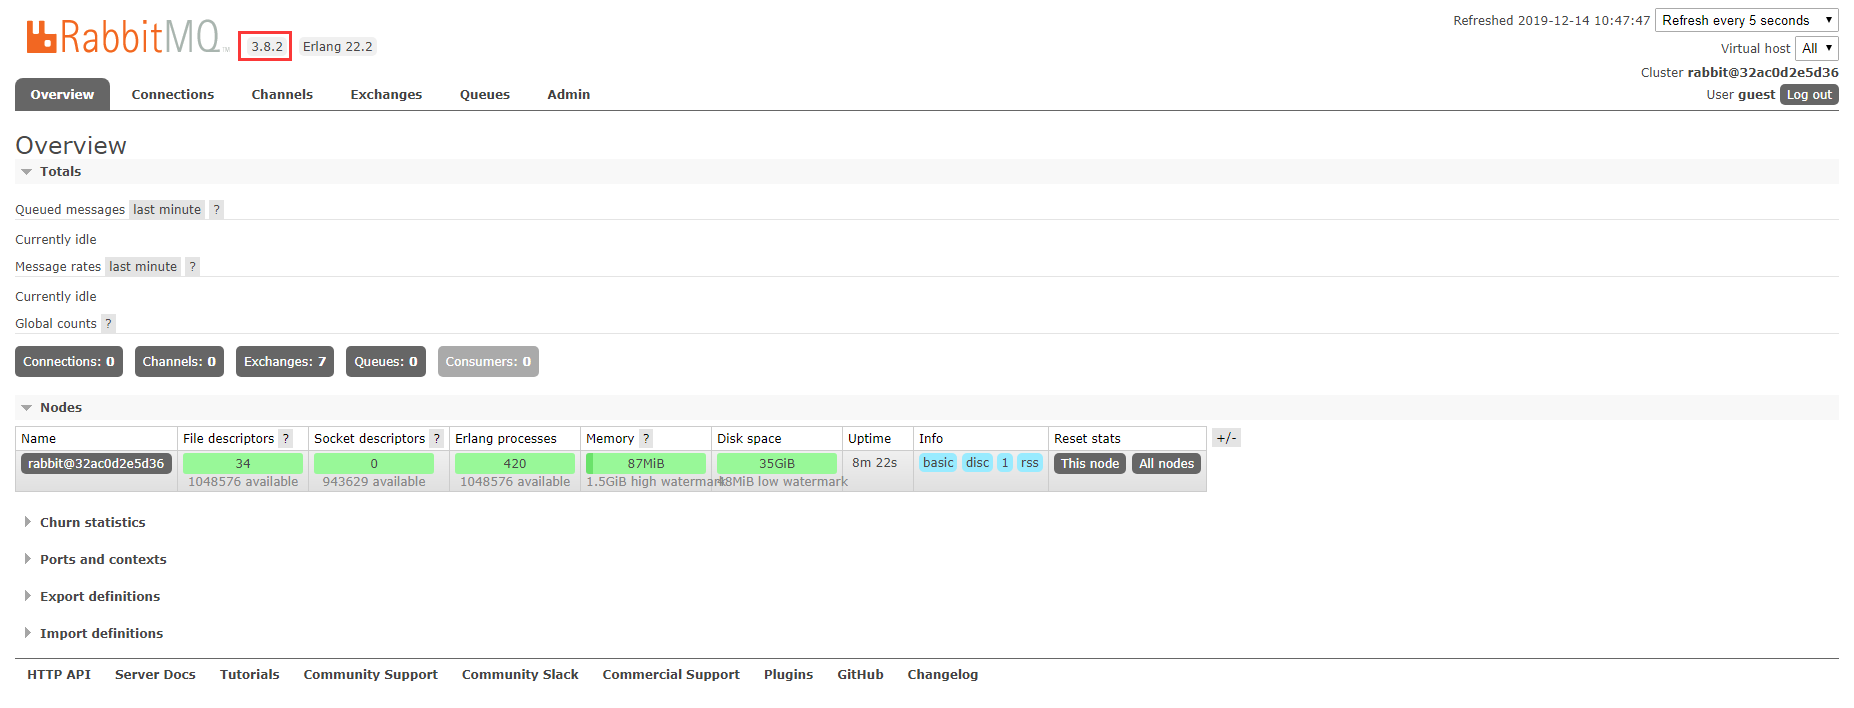
4.png
红框内为你的rabbitmq版本号,我这里是3.8.2
创建一个管理员用户
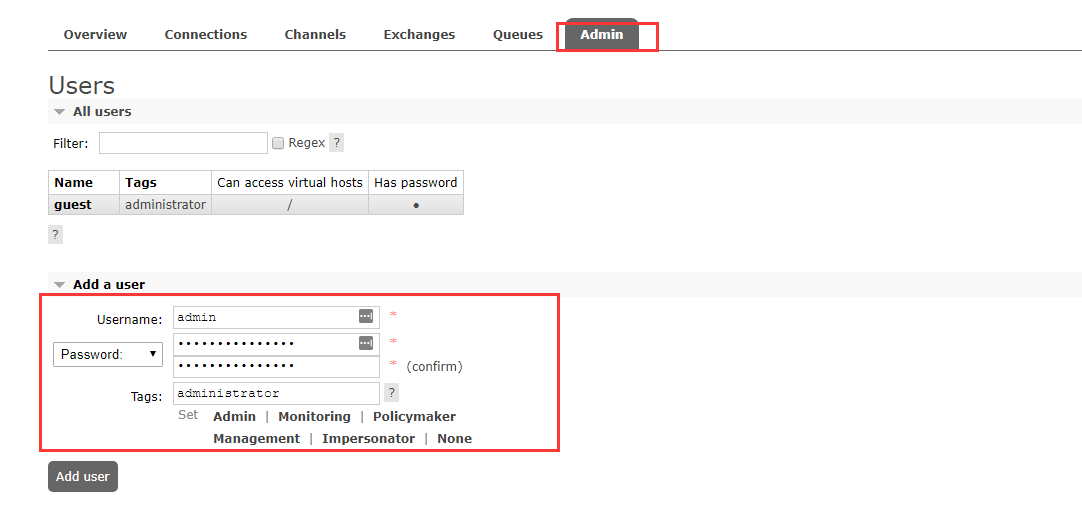
5.png
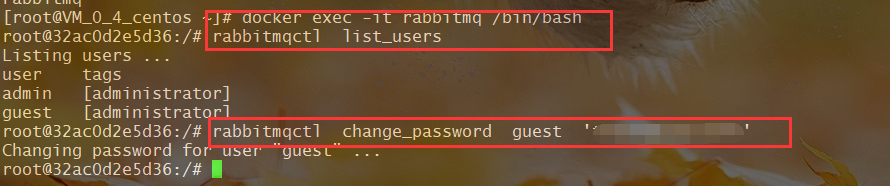
修改guest的密码,请将123456修改为你需要修改的密码
1 | docker exec -it rabbitmq /bin/bash |
修改guest默认密码以防止被人恶意利用
6.png
创建队列及交换机
创建队列可以在mq页端创建也可以在代码中自动创建,我这里直接在页端创建

创建Queen
创建交换机,也在页端创建好

创建Exchange
ThinkPHP实现过程
Composer安装php-amqplib
略
生产者实现
- 创建一个生产者类放置于 common 目录下,方便调用
1 | class RabbitMq{ |
- 实现过程如下
1 | class RabbitMq extends controller{ |
消费者实现
创建一个RabbitMq类,方便之后调用
1
2
3
4
5
6
7
8
9
10
11
12
13
14
15
16
17
18
19
20
21
22
23
24
25
26
27
28
29
30
31
32
33
34
35
36
37
38
39
40
41
42
43
44
45
46
47
48
49
50
51
52
53
54
55
56
57
58
59
60
61
62
63
64
65
66
67
68class RabbitMq extends controller
{
protected $connection;
protected $channel;
protected $exchange; //
protected $queue;
protected $vhost;
protected $consumerTag;
protected $routeKey;
// 此处使用配置文件配置,具体可自行配置
public function __construct() {
//连接RabbitMQ
$this->queue = Config::get('database.RabbitMQ')['queue'];
$this->exchange = Config::get('database.RabbitMQ')['exchange'];
$this->vhost = Config::get('database.RabbitMQ')['vhost'];
$this->consumerTag = 'AgentOrder';
$this->routeKey = 'addOrderAndSub';
$host = Config::get('database.RabbitMQ')['host'];
$port = Config::get('database.RabbitMQ')['port'];
$username = Config::get('database.RabbitMQ')['username'];
$password = Config::get('database.RabbitMQ')['password'];
$this->connection = new AMQPStreamConnection($host, $port, $username, $password);
$this->channel = $this->connection->channel();
$this->logMqWright('MQ已连接');
}
// 消费信息
public function getMessage($callback) {
// 队列声明,创建队列,如果不存在则自动创建,如已创建则不需要使用
// $this->channel->queue_declare($this->queue, false, true, false, false);
// 绑定交换机
$this->channel->exchange_declare($this->exchange, 'direct', false, true, false);
$this->logMqWright('---MQ交换机绑定完成---');
// 绑定队列
$this->channel->queue_bind($this->queue, $this->exchange, $this->routeKey);
$this->logMqWright('---MQ队列绑定完成---');
// 信息消费,no_ack 为true时为自动应答
$this->channel->basic_consume($this->queue, $this->consumerTag, false, true, false, false, $callback);
$i = 0;
while (count($this->channel->callbacks)) {
$this->logMqWright('---MQ执行次数统计[' . $i . ']---');
$i++;
$this->channel->wait();
}
}
// 日志写入函数 目录/runtime/agent_log/当前年月/当前日期MQ.txt
protected function logMqWright($msg) {
$val = "";
$currentDateTime = date('Y-m-d H:i:s', time());
$currentDate = date('Ymd', time());
$fileDir = __DIR__ . '/../../runtime/' . 'agentlog/' . date('Ym', time());
if (!file_exists($fileDir)) {
mkdir($fileDir, 0777, true);
}
$fileName = $fileDir . '/' . $currentDate . "MQ.txt";//文件名称
$data = fopen($fileName, 'a+');//添加不覆盖,首先会判断这个文件是否存在,如果不存在,则会创建该文件,即每天都会创建一个新的文件记录的信息
$val = '[' . $currentDateTime . ']:' . $msg;
$val .= "\n";
fwrite($data, $val);//写入文本中
}
//关闭进程
public function stop() {
$this->channel->close();
$this->connection->close();
}
}消费者消费过程
1
2
3
4
5
6
7
8
9
10
11// CLI接口,需要开启守护进程
public function catch() {
//连接RabbitMQ
$RabbitMq = new \app\common\RabbitMq();//队列
$this->logAgentWrite('------------------MQ链接成功 开始整理MQ消息------------------');
$callback = function ($msg) {
echo $msg;
// msg为队列内的信息流,在此处填写消费过程即可
};
$RabbitMq->getMessage($callback);
}消费者创建监听接口,用于守护进程调用
1 | class MqService{ |
至此所需要的代码就完成了
消费者脚本
守护进程
tips:只适用于Linux
我们在使用PHP作为消费者时,一般是使用PHP直接执行文件,使用nohup守护进程调用,但是当系统不稳定时,可能会出现各种问题导致mq队列失效,这时候就需要使用脚本监听,如果守护进程不存在,则自动重启守护进程
首先测试时可以先执行守护进程命令,例如
1 | nohup /usr/bin/php7.2 /alidata/workspace/test/public/index.php /api_comm/mq_service/mqAction & |
路径请自行修改
监听信息
编写Shell如下
1 | !/bin/sh |
将该脚本重命名为 mqMonitor.sh
配置Crontab
在crontab配置文件下加上一行
1 | */2 * * * * sh /root/mqMonitor.sh |
保存后重启生效,大致是2分钟监测一次,可自行修改